This entire site is about watercolor techniques and other painting techniques. But here, you will find a growing list of step by step techniques I use to create my watercolor paintings.
Each of the watercolor techniques I detail will be a building block that you can use to practice and add to your bag of tricks. Occasionally, I will offer a downloadable e-book that compiles all of my best techniques into a single format. I've already done that with my watercolor canvas e-book. I wrote this to introduce the techniques you can use when painting on the new watercolor canvas medium. I love it.
One more thing before we begin! You can contribute watercolor techniques yourself. On certain pages, you will see a form that asks you for your story. This feature will let you contribute a complete web page of your own to the topic being discussed (including an image). I don't care if you are a novice or a well-known watercolorist. All contributions are welcome!
I have several videos on how to use your brushes. I am posting a couple on this page. The rest are on my page on using brushes.
The SCRUBBER (click to see the video)
We all make mistakes when painting, or we need to scrub out a highlight that will add to the impact of our painting. In this demo, I will show you how to lift out sharp edged highlights by using magic transparent tape, Scotch brand 810....the frosted kind. DO NOT USE THE CLEAR KIND! It sticks much to tight and the removal will tear into your paper fiber.
SCUMBLING (click to see the video)
This is a technique that is used to create texture and to define the surface of certain objects. It is a sort-of dry brush technique. |
My E-Books
Learning the Basics of Watercolor
Painting Flowers in Watercolor
Painting on Watercolor Canvas
|
Watercolor Techniques Begin Right Here
This is the place to come to find information on all of the techniques I use to create my works of art. I urge anyone who wants to share a technique or add a new twist to submit it using the form at the bottom of the page.
Your submission will receive prominence with it's own web page! Please share!
General Watercolor Techniques
Watercolor Flat Wash . A flat wash is one that is a solid color from the top to the bottom of the page or area in which you need a flat color.
Watercolor Graded Wash. Each stroke should be slightly lighter than the one before. This is accomplished by dipping the brush into water before each successive stroke, so that the pigment is diluted at each pass of the brush.
Glazing With Watercolor , see video on Youtube. So many beginning artists are afraid to put color on the paper. We all want to jump right in and paint a subject before we think about what is going on around it.
Wet-in-Wet Watercolor Technique - Applying color to a wet surface. Usually I wet the paper or surface (speaking of canvas or Claybord®) first, and while it is still wet, I apply the first color of the painting. …Usually Quinacridone Gold (as it mixes with other colors beautifully).
Dry Brush Watercolor Techniques 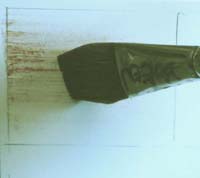 -drybrush video This is a detail technique, when you do not use much water on the brush, but apply the color with a brush that is not dripping wet. You have quite a bit of control with this method, but it should be used for textures and detail. You cannot paint a sky with a dry brush without it taking a week!
Lifting Watercolor -When watercolor is still wet on the paper, it is easy to blot and lift. If it is so wet that it is still shiny, you will possibly lift all the color. When it is dry, you can lift fine detail with a Scrubber. See this video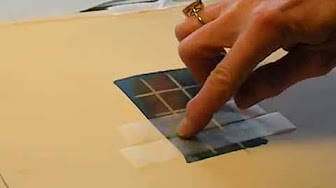
Painting With Salt for Texture -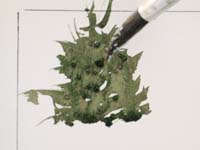 I usually paint my salt on the page, as mentioned above, but there are other ways of applying it. I keep a small jar of salt on my desk that can be sealed against moisture.
Using Masking Fluid - This is the way many artists keep areas of the painting white. Sometimes I use it.....and especially when painting my bird's nests, but it requires much going back into the painting to clean up the edges. It does allow large washes of color to be applied accross the page.
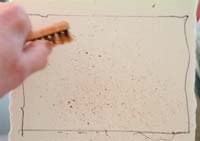
 Splattering Watercolor Tips - For texture in certain situations, watercolor techniques such as splattering paint can be quite effective. This can be done in several ways. One…with a toothbrush, dipped into paint, and using your thumb, scrape over the bristles to let the paint splatter over the painting (mask off the areas where you don’t want the splatter. (and be sure you aren’t going to a dinner party that night if you have use a staining color like Sap Green. It will be underneath your fingernails!
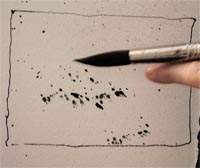
Another way is to dip a damp (round) brush into a pool of color, and tap the brush over a finger of the opposite hand, allowing the paint to splatter on the page.
For a heavier spatter, use a brush dipped in pigment. Tap it against a finger to release the pigment onto the paper. The spatter will be rather bold spots as shown. The more water in the brush, the larger the spatter.
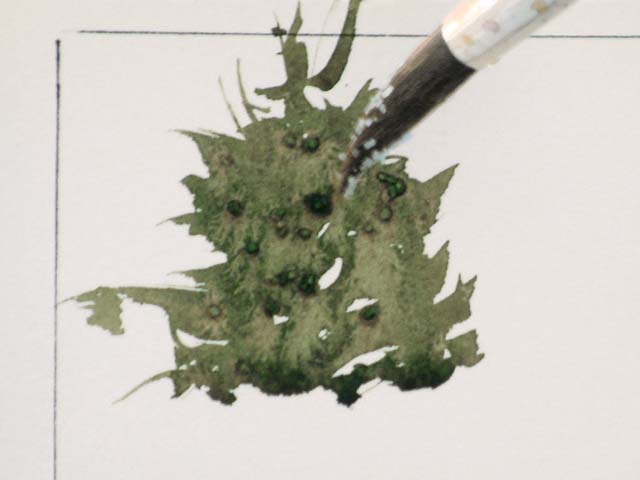
Spraying Watercolor Techniques - 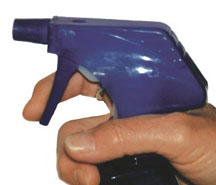 I use a trigger type sprayer to put droplets of water on the painting surface and then drop in color. The paint follows the droplets across the page, and since the droplets run into each other, the paint does not appear to be polka dots! I use this for painting all kinds of tree foliage.
You can also sprinkle water into paint that is already on the page (if the paint is still damp) and then blot if necessary to create texture. On canvas and Claybord®, the paint is easily lifted by blotting, as these surfaces do not absorb the paint.
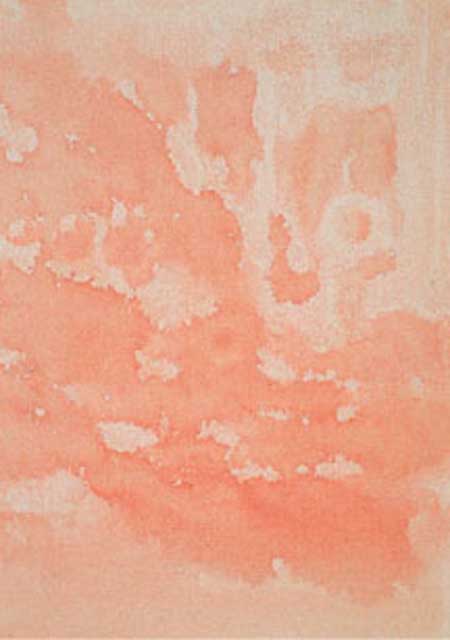
Back Wash Textures - Also called “Blooms”. As stated above, the blooms can be very effective. They are caused when the paint on the paper is still quite damp, and a drop of water or pigment that is very wet, is dropped on the surface. The excess water makes the pigment float to the edge of the puddle, creating a dark, jagged line around it. Sometimes this is good! Usually it is an accident, but I have been known to use if for certain effects, especially when painting flowers.
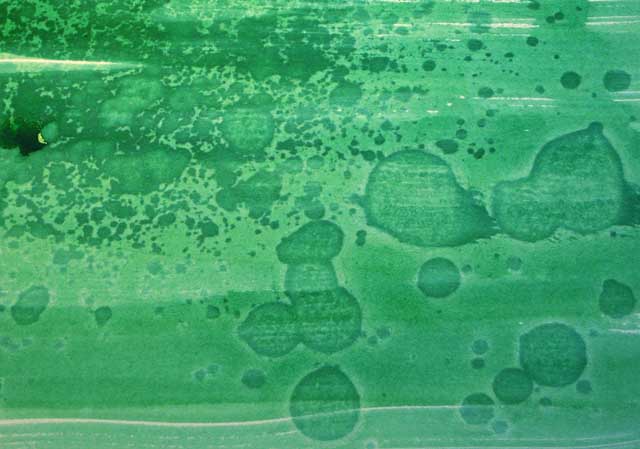 Alcohol Textures Watercolor Techniques - Of course, you know that alcohol and water don’t mix, therefore, alcohol, when sprinkled into a wet wash of color creates a texture. It repels the paint and pushes it aside. The effect is different if you sprinkle alcohol first, and then add the paint. Quite an interesting phenomenon. When it is applied to dry paper, and then the paint is applied, it seems to leave dark spots on the page. This is not always the case. It may have to do with the sizing in the paper. You just need to try it first on a scrap of paper like the one you are painting on, so you can better see the result you will get.
When alcohol is sprayed onto the wet pigment, it causes a "foam" appearance and is great when painting water that is rushing over rocks, ocean waves, etc.
Painting alcohol over wet paint gives quite a different look than applying the alcohol first. This can be used for texture when needed. It seems that the paint protects the paper surface and doesn't create the really dark spots.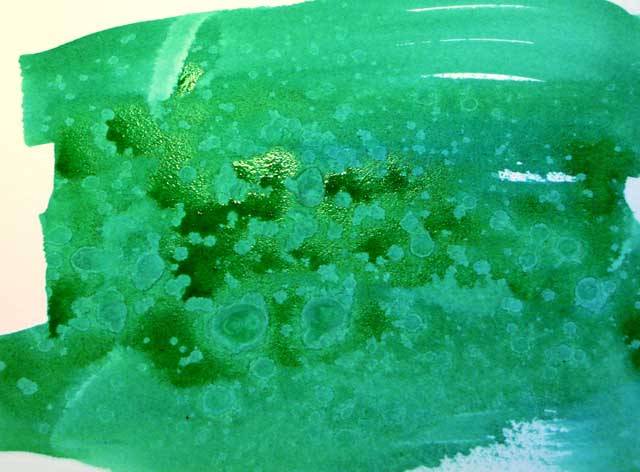
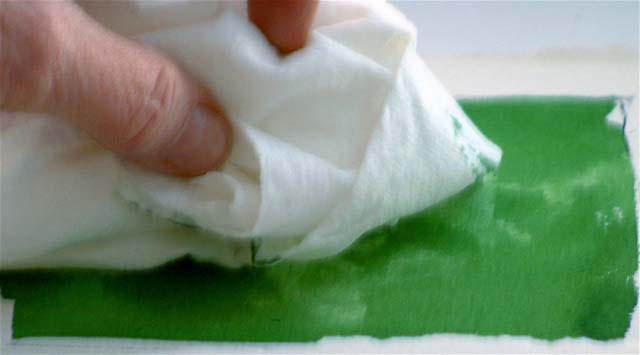
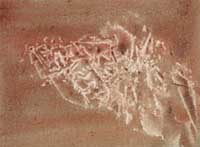
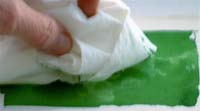 Tissue Paper Texture - Tissue paper is useful in creating textures in foliage, rocks, etc. The paint on the surface should not be so wet that it is still shining or you would pick up all the paint with the tissue. Paint that has “lost its shine” is still damp enough to have textures created by the blotting of tissue.
Here's what the tissue paper technique looks like when I'm finished
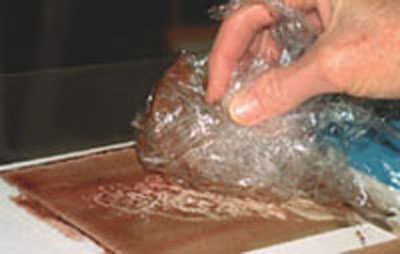
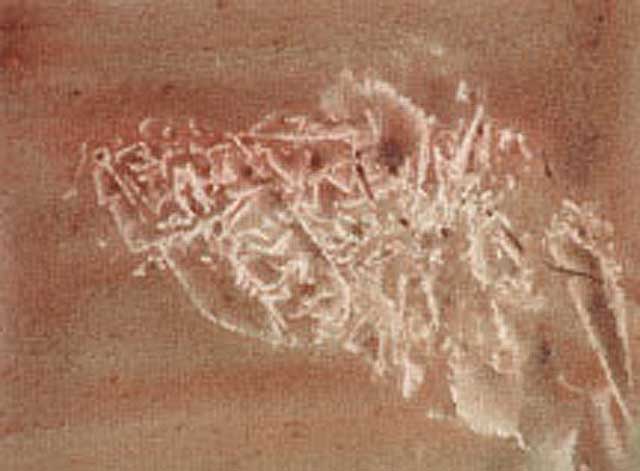
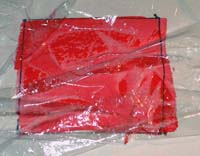 Plastic Wrap Texture Watercolor Techniques - Plastic wrap can be applied when the paper is wet, but must stay on the surface until the paint is dry. First, create wrinkles in the plastic by wadding it up, and then flatten it out on the surface of the paper (canvas or Claybord®). It can be pulled and stretched in different directions to alter the texture.
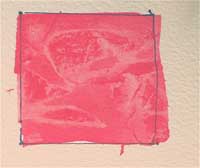
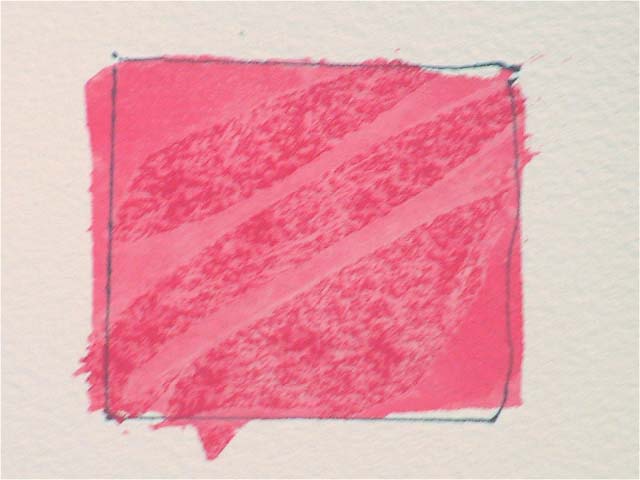
If you need directional lines in your texture, it can be pulled and stretched in different directions to alter the texture. 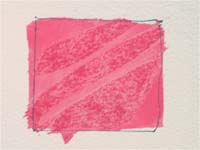
To add to the texture, salt can be applied under the plastic. When the plastic is removed you will have a texture much like this. 
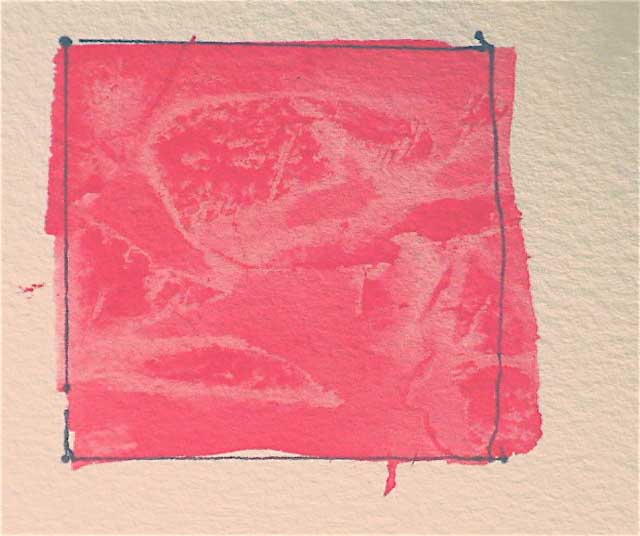
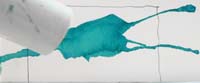
Plastic wrap can also be used on heavier pigment as a blotter like the tissue. It will pick up the pigment and leave wonderful textures.
 Make sure that the pigment is not really shiny and wet with lots of water. It needs to be juicy, with only a tiny bit of water added, so that the plastic can pick up the pigment to create texture.
If the pigment is too wet and thin, the color will just run back together after you lift the plastic off the surface. Timing is everything when using these techniques.
I am a firm believer that these watercolor techniques are only a means to an end, and should be disguised if possible, so that the viewer has something to think about. It is like the rule in flower arranging…Hide your mechanics! I usually paint back into these textures to fool the viewer into believing that I created it all by myself.
Masking Fluid Techniques- I seldom use it, but the brand I prefer is Winsor Newton Liquid Masking Fluid (with the yellow color so you can see where you have painted it on the page). It should be applied to totally dry paper, and allowed to dry totally before applying paint over the top.
It is used for keeping the white of the paper in difficult areas, so that you can paint freely without destroying the white. However, when removed (either by rubbing it, or using a rubber cement eraser) the edges are never quite what I thought they would be. Then I have to go back in with a scrubber to adjust the edges. I might as well have painted around the whites to begin with!
It also can be splattered to maintain small spots of white (like in a snow scene) or other such subjects.
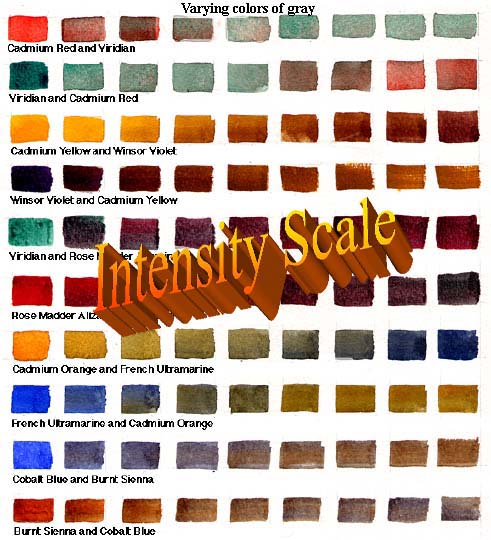
 Intensity Scale - For making grays, we use the complementary colors on the color wheel. Start with one color; let’s say a blue. Paint a solid square of this blue. Then in the next square, add just a touch of its complement (orange) Then in the third square, add another touch of the complement; and so forth, until you come to the end when the last square is only the complementary color. In this group of squares you will have varying shades of gray.
Gray is not just a color out of a tube. You create interesting grays with complementary colors. They can be green grays, purple grays, reddish grays, blue grays. This is the way we make our paintings interesting to the viewer. There is nothing more boring than a gray straight out of the tube!
 Using a Blow Dryer - There are times when we need to hurry a painting along, so I use a blow dryer. Remember, however, do not use it full force on a wet passage, as you will push the pigment into areas that you might not want it to flow. Some people seem to think that a dryer changes the look of the paint, but I haven’t found that to be true.
Painting A Snowy Landscape - It's more than blue shadows on white paper! These are more advanced watercolor techniques.
Reflected Light - Reflected light is created by light from a source, like the sun or an incandescent bulb, that shines on a colorful object, and throwing the color from that object onto another plane.
Watercolor Blooms  - My first watercolor instructor, a very fine artist, was opposed to using watercolor blooms. I assume that because his paintings are highly detailed and controlled works, that he found no use for these so-called mistakes. They do begin as mistakes when you are first learning to paint, but I have discovered a way to make them work for me...especially in flower paintings. They are very powerful watercolor techniques.
Color Harmony - Color harmony is essential when crafting a complete work of art. This article discusses the meaning and importance of Hue, Value and Saturation.
Surface Objects and Patterns - When we design a painting we want the viewer to be able to put himself into it...and lead the eye to the focal point, or into the mood. We create some of the path to that focal point with shadows; some with directional lines.
Enhancing Digital Images - Enhancing digital images is a handy skill since we can't always take the perfect picture. It used to be frustrating getting back from a trip and only then finding out bad they were. Now, we the photos are no longer wasted and can also serve as multiple inspirations for watercolor paintings
Watercolor Crystal - The procedure for painting crystal is much the same as lace, exactly the same! However, with the crystal you might be seeing what is inside the crystal or what is beyond it; since it is totally transparent.
Watercolor Lace - I recommend that you master painting watercolor lace without photo realism.
Painting Clouds in Watercolor - Clouds change with the wind, so who is to say what they look like? We see shapes in clouds. Have you ever said, "There's a bear, or a kitten, or a bird in the clouds?" They are amazing reminders of what we have seen on earth, yet so fleeting.
Return to Watercolor Painting Tips from Watercolor Techniques
Go to Watercolor Lessons.
See my 20 videos on YOUTUBE.