There are dramatic snowy landscapes and then there are the dull ones. To just paint shadows against the subject does not give the viewer a warm and cozy feeling. More people have said to me, that snow makes them feel cold. So many years ago, I set out to find a way to make them feel warm.
If you take a look out the window on a winter snowy landscape early in the morning, you will see that the snow is pink….not white! In fact, it is never white, but made up of the snow crystals that are like little prisms of color, which appears to be white.
Late afternoon usually brings a more golden glow to the snow. Of course, I am speaking of those winter days when the sun actually shines!
A first step to your painting
Give a mood to the paper before you get into the subject:
- In some small bowls make washes of your favorite gold, pink and blue. (not together, but in separate bowls!) If you wish to have some tiny sparkle to the snow in certain areas you can spatter liquid masking with a toothbrush in that area before you begin to paint. I use Winsor & Newton Colorless Art Masking Fluid.
- Wet the paper, and apply a thin wash of the golden color. I use Quinacridone Gold.
- Then while the wash is still very wet, glaze the pink into it. (I use Opera). They blend into a beautiful hue. You need not rub the brush over and over the paper. Just let the water carry the paint. The wash does not need to be a solid color. It can be more pink or more golden in areas of the paper. (I forgot to photograph this step!!!)
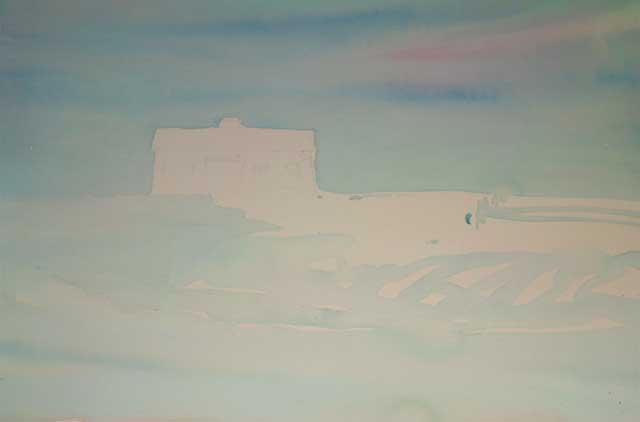
- While this wash is still damp, you can add a blue wash. I chose to place it around the white barn and into some of the shaded areas so that I would have some brilliance to the building.
- Allow this to dry. Then you can begin the painting of the subject matter. You may also draw on top of this wash if need be. If you will be using colors that may bleed if another wash is applied over them (like reds and browns), you might want to put your dramatic shadows in first.
Let's Think About Shadows for our Snowy Landscape
The further away a shadow gets from the object that is casting it, the softer the edges are. Likewise, the closer it is to the object, the most distinct the edges are. Many times all the shadows have soft edges, so the best way to accomplish this is to dampen the paper with a very soft brush so as not to disturb the previous washes.
Allow the paper to lose its shine, then apply the shadow color. The result should be lovely soft shadows. If the paper has not lost its shine and you go into the wash with a brush loaded with water and a thin color, you will produce “blooms” in the wash.
The excess water pushes the previous colors to the edge of the puddle. Now, in certain circumstances, you may want this to happen, but I would suggest waiting for those certain circumstances rather than in the snow scene. I will discuss these blooms in another place.
At this time I chose to go ahead and lay in a dark background to set the stage for the dramatic look. Use any colors that you need in your own painting. I chose Perylene Maroon, Permanent Sap Green, and Q-Gold.
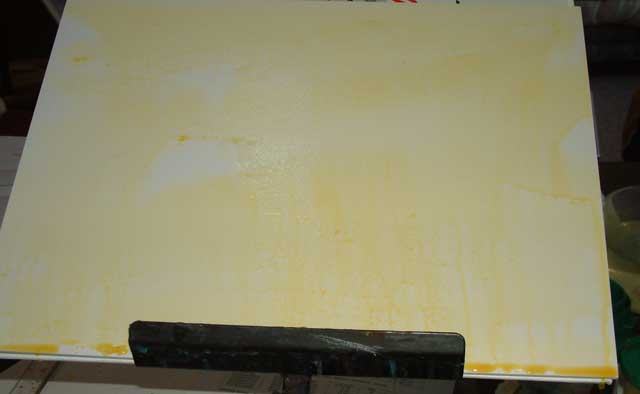
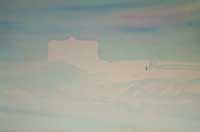
Here you can see the pale gold, pink and blue washes.
I am working on a new surface called, R-tistx,(pronounced "Artistics") which has been developed for all mediums. This one is for watercolor. Check out their site for more information: www.rtistx.com, though at this point they may not be producing more because the man who developed the product has passed away. I think, if you really want some of this product, you could call them to see if there is a source. 877-478-4789
This surface is very forgiving, and while you can glaze on it, you can also lift color easily with just a "thirsty" brush. (one that has been placed in water, then squeezed out).
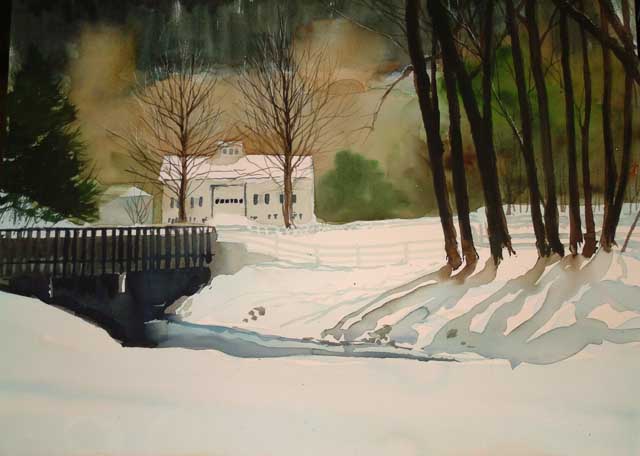
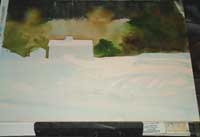
Having added much of the tree and bridge detail, the painting, at this point looks finished. However, it still needs that dramatic effect that I was talking about.

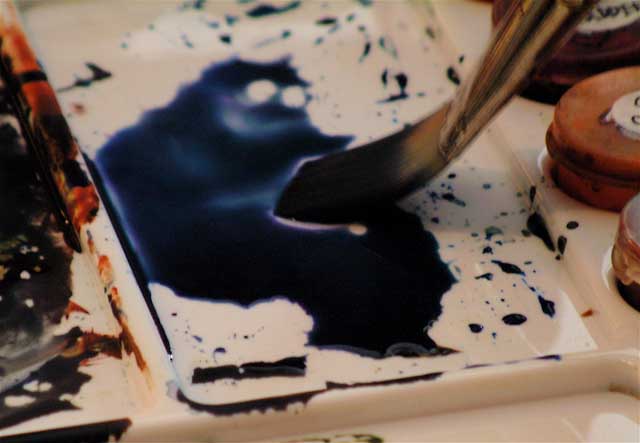
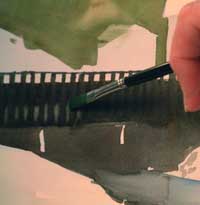
I mix a dark bluish grey shadow color on my palette (enough that I can do a couple of washes if need be to create the effect that I need.) I used Cobalt Blue Hue, Opera, and Q-Gold.....heavier on the blue, so that the shadow would not be just a dull gray color.

I wet the foreground area where the shadow should be with a large soft brush loaded with clear water. Then I dipped the brush into my shadow color and brushed it across the surface. The Rtistx board feels like velvet! The shadow was smooth and glowing.
This step can make your heart palpitate a bit, because you are afraid that you will ruin your painting. But, believe me, it never does. It only enhances the contrast, and creates a center of interest where you have left the light area around the barn.
This “white” area near the middle ground which forces the viewer into the painting and to the focal point. Voila! You should find it more interesting.

At this point, I did not think the snowy landscape was quite dramatic enough, so after everything was dry, I repeated the process, by wetting the shadow area again with clear water, and re-applied the shadow wash. NOW, it is a finished painting.
If in this process some of your foreground detail bleeds a bit, just touch it up if it needs to be sharpened. But remember that your sharpest edges, and the lightest light and darkest dark make up the focal point.
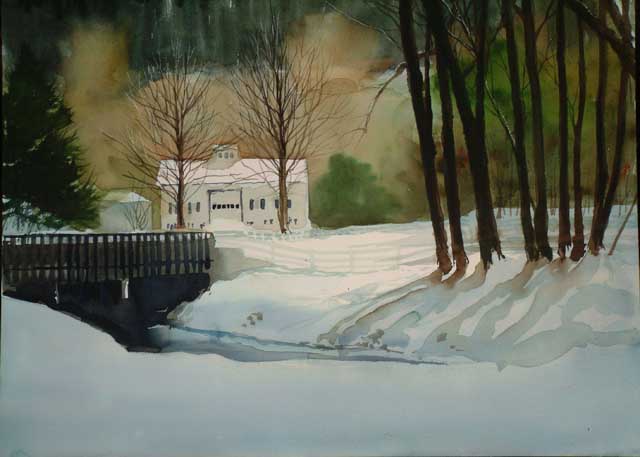
This is the finished look at my snowy landscape. Click it to Enlarge
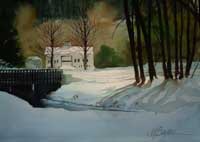 |
I won the Viktor Schreckengost Memorial Award at The Gates Mills show for this painting. It also sold that night to one of the patrons. |
Related topics:
Objects-Patterns-Shadows
Landscapes
Horizons
Spattering and Spraying Techniques
<<Return to Lesson 19: Return to Flat Wash
Advance to Lesson 21: Portraits>>
Watercolor Painting Tips
Watercolor Techniques
See my 20 videos on YOUTUBE