Lesson 6
by Mary Ann Boysen
Painting without drawing is much easier than it sounds. Actually you ARE drawing. For years I laboriously drew my subject with a pencil before I began to paint. Then one day, I loaded my paints in a cart and proceeded across the street from my gallery to the local Riverside Park to paint. I opened my little folding chair, and proceeded to unpack my supplies to find that I had left all my pencils at the studio. I was not about to leave my things in the park (even though our little town is quite safe), and I wasn't about to haul everything back across the street, so I picked up my brush, a little flat one, and began to look at shapes. Before I knew it I had painted an entire picture quite accurately without drawing with a pencil.
These are instructions for watercolor painting without drawing that I share with my journal painting students. When you are traveling, there is just no time to sketch and then paint before it is time to move on.
First and foremost a watercolorist needs to train his/her eye to see shapes…..and most importantly negative shapes.
A great exercise is how to paint your name (with which you are most familiar) in negative shapes. |
Related Topics:
Perspective and Negative Shapes
|
Beginning with painting a rectangle in a pale color, then painting your name (with a flat brush) in a complimentary color. Use a block type style and print your name. You may also draw a rectangle around it (touching the tops and bottoms of the letters). Examine then, the shapes around the letters.

Next try painting those shapes instead of the letters. Not so easy! (ALSO, try other complimentary colors. Let's start with a red background. Then paint the blue around the letters so that red letters appear.


If you think this is hard, try writing your name in longhand and then painting the negative shapes!
But you should get the idea. It takes practice, just like learning to print your name all over again! Watercolorists are the only artists that need to train themselves to see these shapes. That is probably what makes watercolor a bit more difficult than other mediums.
When you think you have mastered this you may continue with some easier shapes!
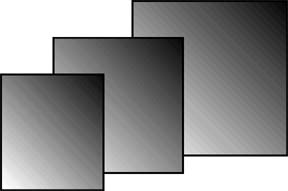
Start with simple shapes (overlapping)
Two or three rectangles or squares
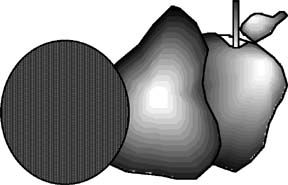
Two or three round shapes (apples, oranges, lemons or a variety of round objects).
Draw a window (first using a pencil).
Paint a window using a flat brush (preferably 1/4 to 1/2 inches wide.

Speed it up using just a brush
Painting a tree
With a flat brush, paint the foliage of a tree (any shape that you desire). Pine trees come to a point at the top, and deciduous trees are more broad spread. When the paint is dry, put a few smaller shapes within the larger shape for depth.
Now paint the trunk and branches. The smaller branches may be in front of the foliage or sticking out through some of the holes in the foliage.

To Begin Painting without Drawing
I highly recommend the use of a small flat brush, probably 1/8" to 1/4" in width to begin with. When I am painting outside, I paint a bit smaller than when painting in the studio. The effects of sunlight and humidity can wreck havoc with your control.
The first thing I look for is a focal point. Knowing that my focal point should never be in the center of my page, I aim my brush just above or below and to the right or left of center . That is where I place my first stroke. If it is a window, a flat brush is ideal because with one vertical stroke with the flat side of the brush, I have painted a window!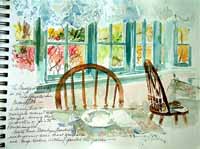 The next thing I look for is a shape that is either adjacent or near the window. I might even be another window. If so, I look to see if the second window is the exact same size as the first. That would be true if I am looking directly at the subject from the front. However, I usually am more attracted to a building from an angle. In this case, the window that is furthest from me would be a bit smaller than the first. It might not even be visible with the naked eye if you are far from the subject. But just know that it is. The next thing I look for is a shape that is either adjacent or near the window. I might even be another window. If so, I look to see if the second window is the exact same size as the first. That would be true if I am looking directly at the subject from the front. However, I usually am more attracted to a building from an angle. In this case, the window that is furthest from me would be a bit smaller than the first. It might not even be visible with the naked eye if you are far from the subject. But just know that it is.
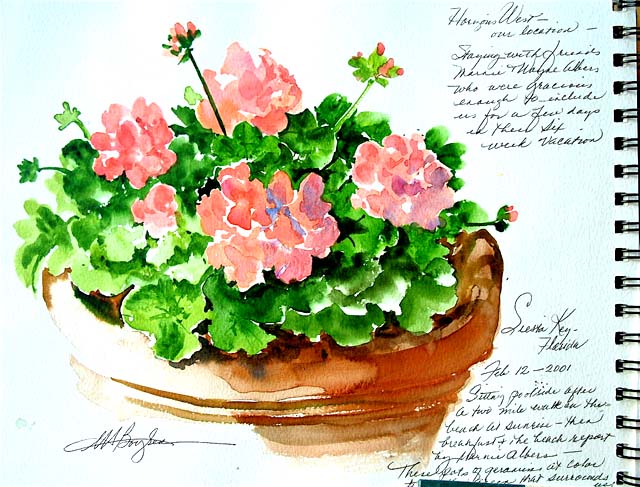
Now, if you are painting objects that have no real rectangular shapes, you may use a round brush. In the case of a vase of flowers, or a potted plant, I begin with the flowers, as they are the lightest and brightest objects, and need to be placed on the page first to maintain their brilliance and local color. In watercolor, you cannot place a light or bright color on top of your green leaves. It would be instant mud.
So in this example, I began with the geranium in the center of the pot. I then, painted the surrounding geraniumns, noting that they were smaller than the first. Since geraniums are a "cluster" flower, meaning the blossoms are made up of numerous little flowers, I try to paint individual little blobs of the red, twisting my brush to make little circles and NOT drawing a circle and then filling it in! Each petal is a single stroke. Then I proceeded to paint the lightest green color around them.
It is important to learn to use the finely pointed tip of your round brush, as it is the only part of the brush over which you have complete control. I keep the tip of the brush against the flower so that I have a very sharp edge, and the point can lay pigment in the small creases between the petals of the flower. After the initial green wash is on the paper, I then go back into each leaf with a darker color for shading, and then put in the dark negative shapes between the leaves. 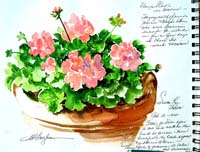 This painting is in one of my travel journals. Several notes here: When painting the flower petals, avoid dry brush strokes by wetting each petal first with clear water. Then the paint will flow nicely in the petal and look fresh. Apply the same technique when painting the leaves. This painting is in one of my travel journals. Several notes here: When painting the flower petals, avoid dry brush strokes by wetting each petal first with clear water. Then the paint will flow nicely in the petal and look fresh. Apply the same technique when painting the leaves.
<< Lesson 5: Dramatic Skies
Advance to Lesson 7: Negative Shapes and Perspective >>
Return to Watercolor Lessons
Watercolor Painting Tips 
|